Entry Counter for Shopping Mall With Pinoo
Aim of the Project: To determine the number of people entering the shopping mall using the Pinoo Control Card. (This application is the entry level. If it is desired to make it difficult, the maximum number of people is determined. When this number is reached, buzzer can be given)
Time: 2 lessons
Age Group: 9 years old and above
Main goals:
- Learns to code Pinoo Control Card.
- Learns to use the distance sensor.
- Learns to use Lcd module.
- The ability to establish algorithms improves.
- Coding skill improves.
- Design skills improve.
- Learns the concept of variable.
Required Materials:
- Mblock 3 program
- Pinoo Control Card
- Distance Sensor
- Lcd Module
- Cables

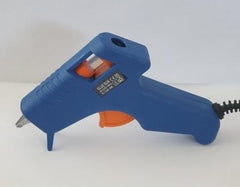
Materials Required for Design: Empty cardboard box, door figure, silicone gun and silicone, felt.


Implementation of the Project:
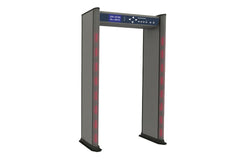
- Let's start our project by designing the door first. Let's cover our cardboard box with the image of the door with the help of the silicone machine. Then, let's cut the front and back of the door with the help of the carpet knife.


- After covering the box, let's cut the distance sensor to place it on the box.

- Next, let's fix our distance sensor to this part. We place our distance sensor in such a way that it can see the ground, so it can clearly detect people passing through the door.

- In our next step, let's cover the empty parts at the top with felt.

- After fixing the distance sensor, let's fix our Lcd module to the top of the door with the help of a silicone gun. The lcd module will show us the number of people passing through the door.

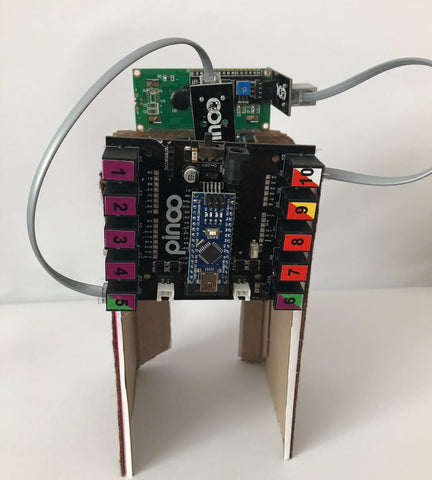
- After fixing the distance sensor and Lcd module, let's make the connections with the Pinoo sensor board. We connected the distance sensor to port 5 and the Lcd module to port 10. We fixed the Pinoo sensor board to the back of the door with the help of a silicone machine.

- We have completed our design and connections. Let's move on to the coding part. For encoding, we will use the Mblock 3 application.
- Let's connect our Pinoo Sensor Card to the computer with the connection cable and enter the Mblock3 application. Then, let's connect our Pinoo sensor board with a computer. For this step, we first click on the serial port option from the Connect tab. Then we select com4. (The number may differ depending on the computer and port.)

- After making the serial port connection, let's choose the card we will use from the cards tab. We work with the Arduino Nano model.
- After selecting our card, we click on the Pinoo option from the Extensions tab. We will write our codes with the Pinoo extension.
- After making our selections, we finally complete the connection process by doing Firmware Update from the Connect option.
- After the update is over, we proceed to the coding stage. First of all, for our application to work with a computer independent power supply, we need to load the codes into our card. Therefore, we start with the Pinoo Program coding. (In addition, the Lcd module does not work with the green flag event. It works after loading the codes into our card. So we start with the Pinoo Program code)
- Then we continue with the code 'Prepare the Lcd module'. Here we have specified the model of the Lcd module. The numbers of people entering the mall will appear on the screen of the Lcd module.
- Then we continue with the condition statements. We will compare the value of our distance sensor with a value we write in front of it. According to this condition, some transactions will take place.
- For this, we take the 'less than' action from the operations menu and place it in our condition statement.
- Then, if the value measured by the Distance Sensor is less than 10 cm, that is, if a person has passed under our sensor, we will make the numbers appear on the LCD screen.
- We get the 'Lcd Print' code into the condition to see the number of people passing through on the screen. We will determine that the number of people changes automatically on program by using a variable, not by writing by hand.
- In order to change the number of people automatically, we create a variable called “counter” from the Data & Block menu.
- Our counter should be 0 when the application starts. For this, we get the appropriate code from the Data & Block menu.
- If the value observed by the distance sensor is less than 10cm, one of the doors has passed. Therefore, we increase our counter by 1 within the condition expression. In other words, 1 person has entered.
- We place our counter variable in the "Write" section of our Lcd Print code. We will see the value shown by our counter variable on our LCD screen.
- By taking the 'combine texts' code from the operations menu, we add the counter variable to the left and the text “person/people” to the right. In this way, we will say " 2 person/people".
- We place the code we write in space of the Lcd Write section.
- After the number of people increases by 1 and print this value to the Lcd Module, we give 3 seconds for the person to pass through the door. This period can be extended or shortened.
- We include the code 'Repeat Continuously' to check our condition statement continuously.
- Finally, we load the codes we wrote in our card. For this, we right click on the Pinoo Program code and select the 'Upload to Arduino' option. (Because we work with Arduino Card)
- In the page that opens, we click on Upload to Arduino again at the top right and we wait our codes to be loaded on the card.
- After the installation process done, we close the page and remove the connection of our Pinoo control card from the computer and power our card with the help of a 9v battery. When we insert batteries into our project, it will automatically get power and start working. When we extend our hand to the bottom of our distance sensor, we can see that the value increases on the Lcd Display.


